
Annotation processing has become quite common in Android development. Most of us use libraries that use annotation processing to help us write better code. Examples of such libraries include, but are not limited to: Dagger, Data Binding, Room, Butterknife and many more.
Annotation processing really shines when we have a lot of boilerplate code that usually doesn’t change much. Think what Data Binding or Butterknife are doing. They help us get rid of writing findViewById() all over our classes, helping us write code that is shorter and eventually, cleaner.
How does it work?
To describe it simply, it uses Java annotations to mark code that should be preprocessed and generates code based on the present annotations. The benefit here is, that unlike reflection, annotation processing is compile-time. This means that it does not slow down the actual execution, unlike reflection (unless you generate slow code).
Of course, this is a very sparse description of what actually happens. There are actually multiple steps in the entire process. They are as follows:
- 1. The compiler looks for all available annotation processors,
- 2. Run annotation processors for existing code with specified annotations,
- 3. Generate any code, if needed,
- 4. If any new classes were created, rerun the annotation processor for those classes, repeat until there are no new classes generated.
Building our own
To demonstrate annotation processing we’ll create an incredibly simple dependency provider. It will look for fields annotated with @Depend and generate a new class for every class that contains such fields. It will contain a static function called ‘provide’ that will take all the field values as parameters and set the field values to those parameters.
To get started we need to create a new Android project. I’ve created mine under the name ‘Depender’ with the package ‘equaleyes.com’. The code for this demo will consist of three modules:
- app – the android app module that we will generate the code into
- annotations – the annotations that we use will be contained here
- processor – the code that will be processing the annotations
Both the annotations and processor modules should be plain Java modules. The processor module has the added benefit of not actually being contained in the app, so we can use all the new Java 8 features!
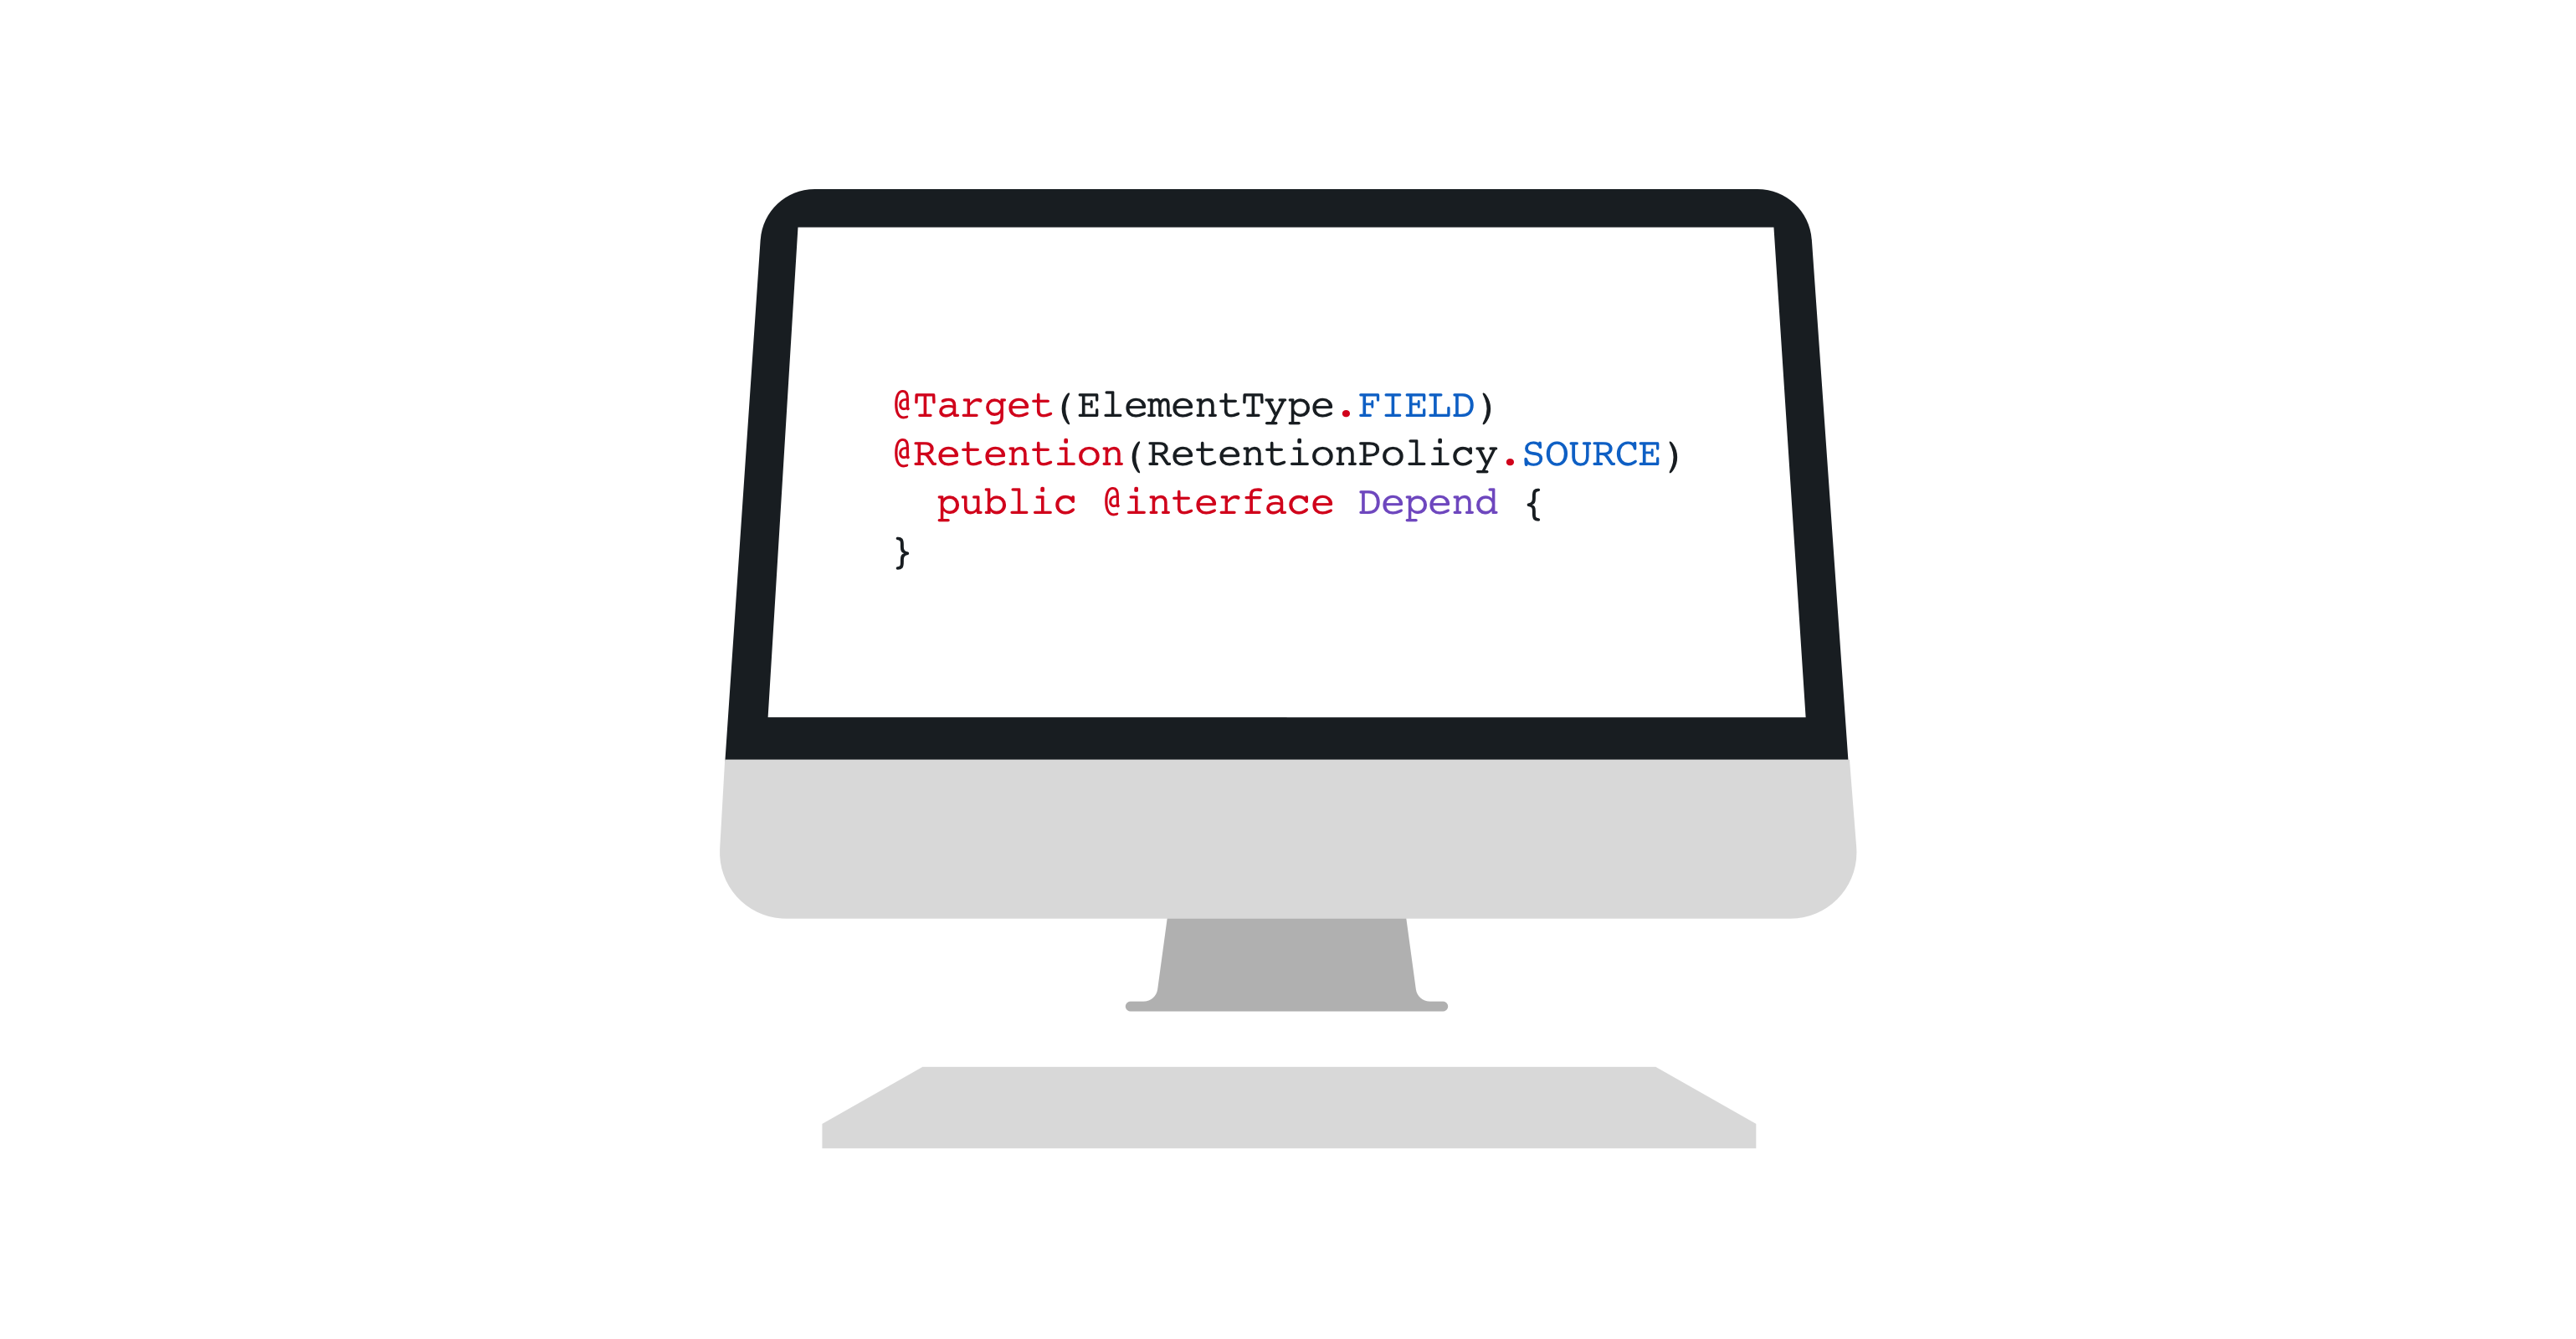
Let’s start with the annotations. Any Java developer should be familiar with annotations. We meet the @Override annotation quite often. As mentioned, our processor will be handling the @Depend annotation:
Since the annotation is only required at compile time, we added @Retention(RetentionPolicy.SOURCE), which means that it will not be built into the class files or available at runtime. The @Target(ElementType.FIELD) annotation specifies that the annotation may only be applied to fields.
Next, we need to add this module as a dependency to our app module. We could add it with compile/implementation, but since they’re only needed at compile time, we can use provided/compileOnly instead:
We can now test annotations by adding a field to the MainActivity and annotating it with @Depend. In my example I’ve added a name field:
Note that the field is marked as ‘protected’. This allows us to set the value from other classes in the same package, which is exactly what our provider will be doing.
Now it’s time to create a processor module. It should be a plain Java project. We’ll create a class called ‘DependProcessor’, which will extend the ‘AbstractProcessor’. When doing that, Android Studio tells us we need to implement the process function, where the actual processing will take place. Next up is registering the annotation processor. You may see that the class is marked as unused. We will fix that by creating a file in the src/main/resources/META-INF/services directory. The file must be named javax.annotation.processing.Processor . Inside the file we add a line for each annotation processor. In our case, the line is going to be:
This tells the compiler to use our annotation processor. Back to the Java code, we notice that the class is no longer marked as unused. Next up, we need to make sure that the processor will be called when there is an @Depend annotation somewhere in the class. We achieve that by overriding getSupportedAnnotationTypes:
This should be self-explanatory, we return a list of canonical names of annotations we would like to process.
On to processing! We need a list of classes, along with the fields in them that we need to set. We will achieve that by using a HashMap, using the classes as keys and lists of fields as values. Unlike reflection, we do not have a separate class for Field or Class, everything is of type javax.lang.model.element.Element. Let’s create a map that will contain the mentioned values:
Next, we need to get elements that were annotated with our annotation:
We need to process every field and make sure it is valid for our use case. For example, we cannot set fields that are private or final. We can check for these modifiers like this:
where a field is an instance of Element – an item from the set of fields we declared earlier. Since we also need to be aware of which class contains the field, we need to get their enclosing class as well:
We’ll use ‘parent’ as the key for the dependants map and add fields to their corresponding values.
In order to report errors we need an instance of Messager, to write files we need a Filer, and to get the packages of elements we need an instance of Elements. These can be easily obtained by overriding the init function:
If we discover anything in the code that we want to warn the user about, or maybe report a compile error, we can do so by using the messager. Here is an example of reporting an error that will direct the user to the field/class that it occured in:
Now we can finally start generating the actual code! We need to remember that in order to set protected or package private fields we need to be in the same package. We also need to think of a way to name our generated classes. In our example, we’ll name them the same as the classes we’ll be setting variables in, with a “Provider” suffix. We’ll generate them as follows:
Now, for actual code generation we will be using the JavaPoet library. We could paste together a bunch of strings, but JavaPoet helps us by defining a builder-pattern for building classes and methods. Let’s add it to processor/build.gradle:
In order to generate the class, we’ll use the TypeSpec.Builder:
This creates a builder for a class with a name in providerName that is public and final. Simple, right? Next up, let’s create a builder for the provide function:
The only thing here that might seem strange is ClassName.get(enclosing.asType()). It gets the qualified class name of the enclosing variable, since Element class has no way to receive it directly.
Next up is the function body. We’ll use a for-each loop to iterate the fields in the enclosing class, and add the field as parameter to the function and a statement to the function body:
Since we’re using the Builder, we don’t need to specify all the field names or statements at once, but add them in each iteration. You may notice $L in addStatement. It’s basically formatting used in JavaPoet. In this case $L stands for literal, if we wanted to use a string, for example, we would use $S. There are many more options for JavaPoet, which we will not describe here.
To finish the generation, we need to add the method to the class:
And write the code to file:
To actually use the annotation processor in our app module we need to add the following to app/build.gradle:
The MainActivityProvider will be generated next time we build/run the project. We can then use it to set the field:
The field name will now have its value set to “John Smith”!
We’ve created our very own annotation processor! We handle our custom annotation being present in the code, gather information about superclass, and finally generate a class with a method that sets the annotated fields. All of this without any reflection at runtime!
While it may seem a lot of work at first, annotation processing can save a lot of time if you find yourself writing a lot of repeating code. While our sample may not be as impressive as Dagger, Data Binding or Room, it uses the same concepts.
The full source for this project is available on github