
Today we’ll take a look at how to tackle a commonly designed CollectionViewLayout where items are centered (horizontally). The regular CollectionViewFlowLayout doesn’t provide us with this feature, so we need to add some customizations.
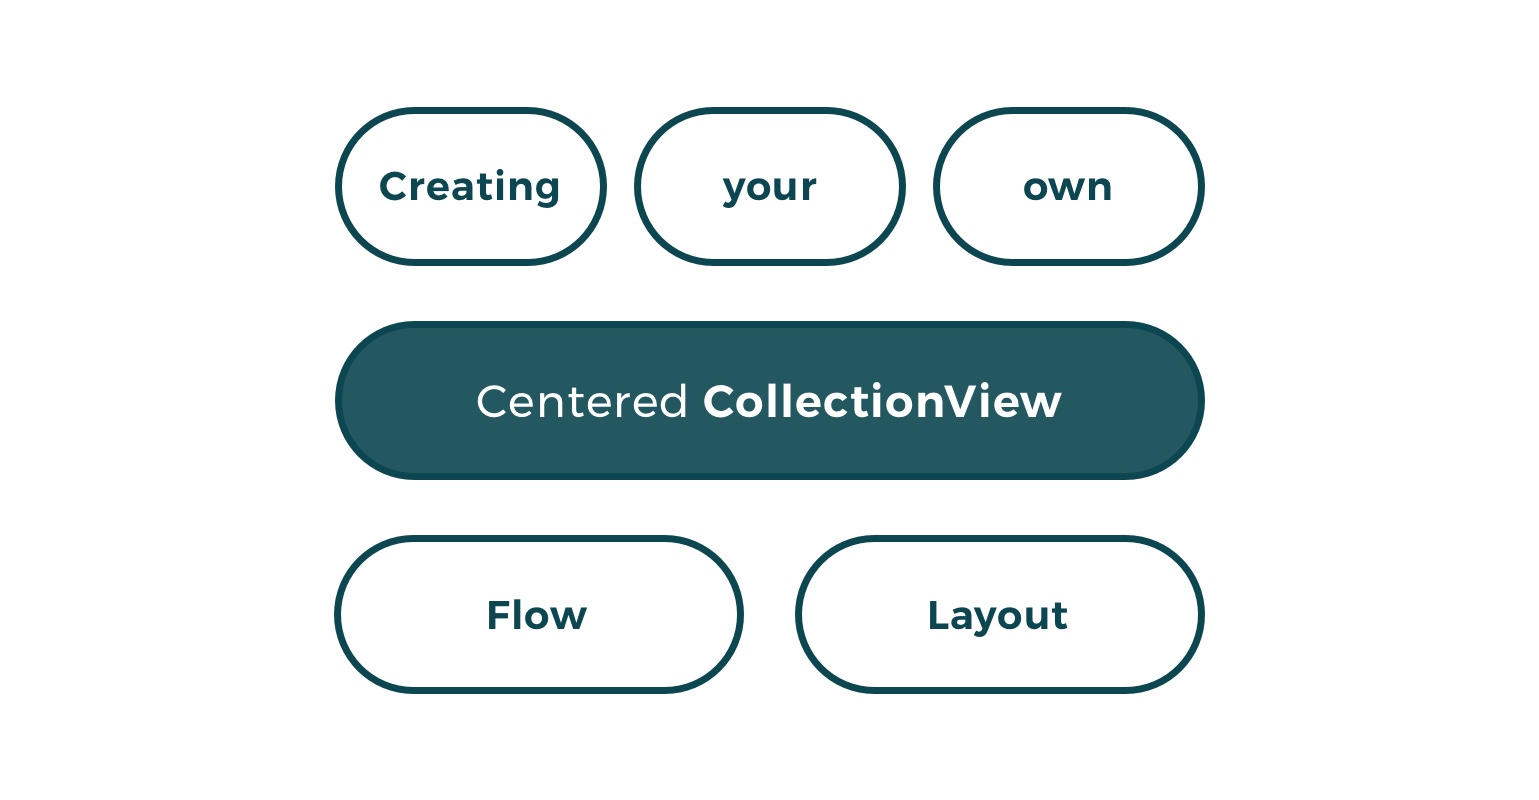
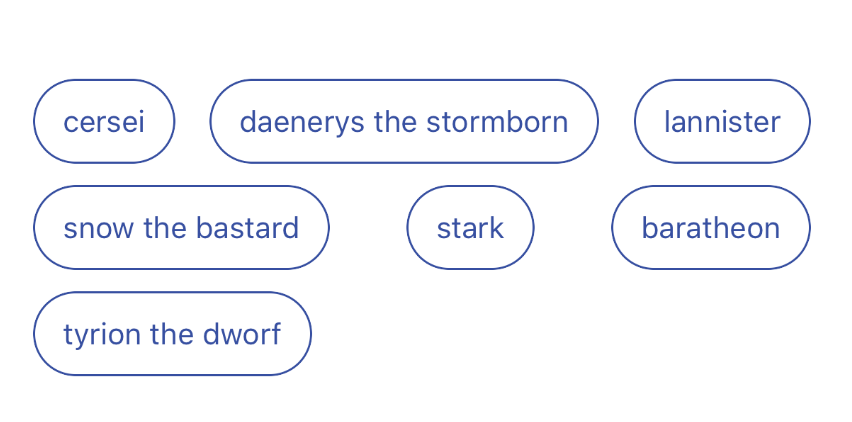
The layout we’ll create today is the following:
First things first, let’s try to use the regular FlowLayout, just to see what happens:
*Note here, that setting the estimatedItemSize to a non-zero value enables automatic resizing of the cells. This is key when working with dynamically sizing cells (with labels for example).
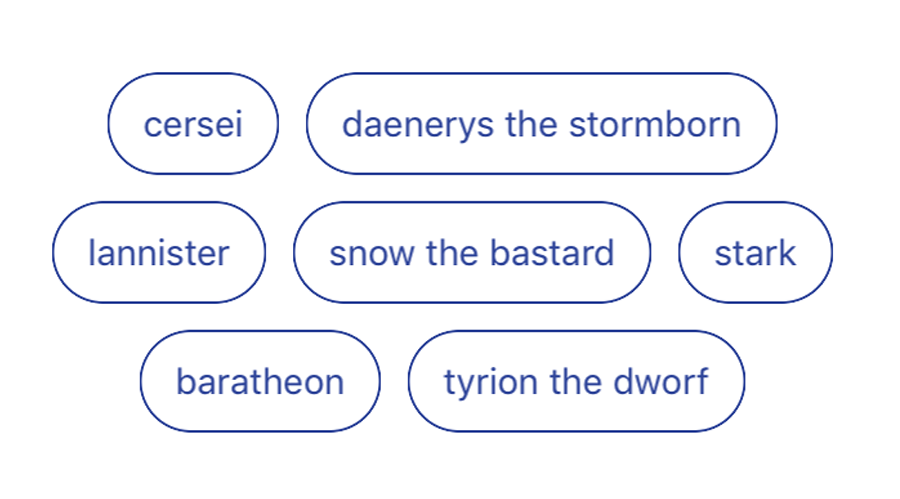
After applying the above layout to our collectionView, we get the following result:
 We already got pretty far, but aligning the cells to the middle is the tricky part.
Subclassing UICollectionViewFlowLayout
To achieve the desired centered layout, we need to subclass the UICollectionViewFlowLayout. The target method to override in our subclass is:
layoutAttributesForElements(in:)
With this method, we tell the collectionView how to arrange the cells, supplementary and decoration views in the specified rectangle. The default implementation of this method does nothing (it returns nil).
Each cell, supplementary and decoration view gets a UICollectionViewLayoutAttributes object to define their position. We need to modify the UICollectionViewLayoutAttributes object for each cell to shift them to the middle and get that desired centered effect. We will be focusing to center layout only to cells (without supplementary and decoration views).
Let’s jump into it!
Firstly, let’s get the current layout attributes from super:
The number of attributes here equals to the number of cells, supplementary and decoration views – each gets its own layout attributes.
The next step is to group the items into rows, so it’ll be easier to rearrange them.
Our Row class looks as simple as:
It contains the attributes for one row in the collectionView. I also added the spacing property which defines the spacing between the items.
Back to the layoutAttributesForElements method. Let’s arrange the claimed attributes from the super into rows:
This is a simple for loop that goes through the attributes for each item and groups them into rows simply by checking it’s Y offset. If the offset is the same, the items are in the same row, otherwise, a new row has started.
The final step is to arrange the items in each row so that they are centered.
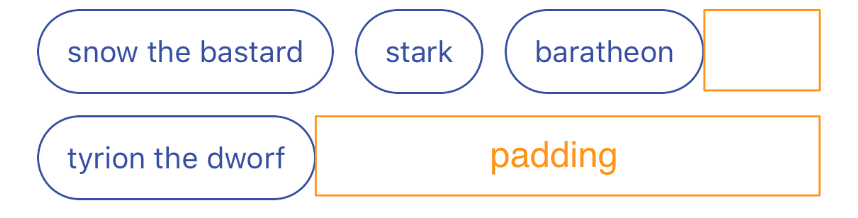
If we look closely at our current state, we notice, that the spacing between the cells is not always the same as it should have been:
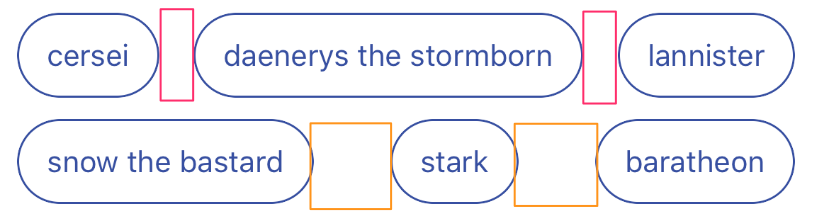
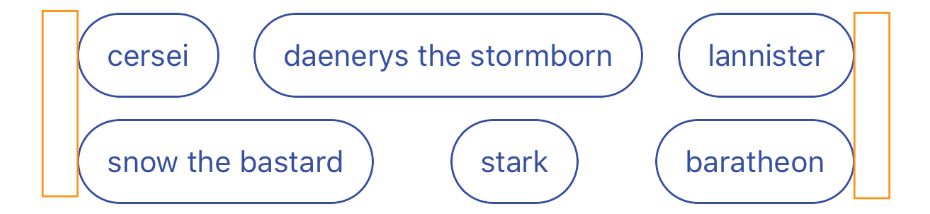
Secondly, the spacing on the left and the right side of each row is equal to zero – which shouldn’t be.
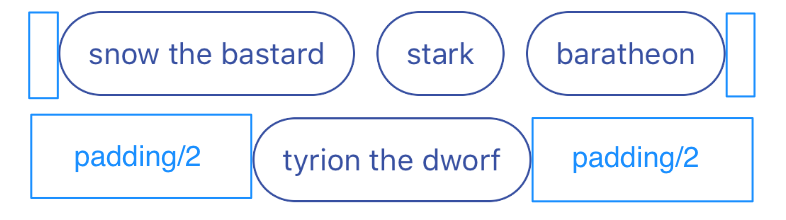
 The idea is, to position the cells so that they have an equal spacing:
…and to push the whole rows to the middle, so that they have equal padding from the left and right side:
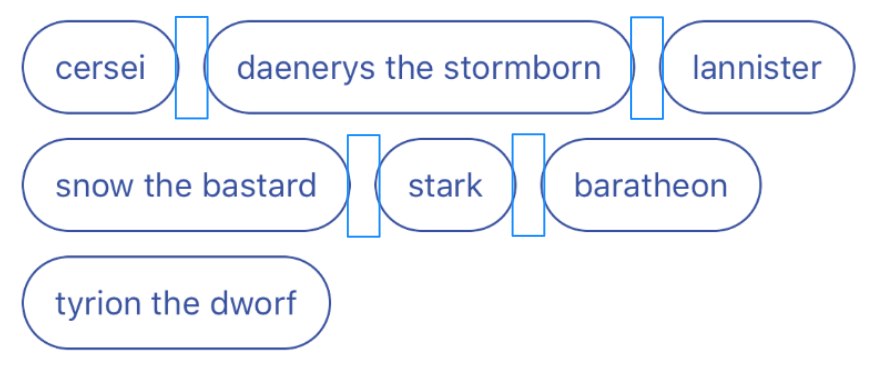
… by simply dividing the remaining padding and add it to X offset for each item attribute:
The magic method doing all the work (in the CollectionViewRow class) is the following:
The `rowWidth` property calculates the actual width of each row, using only the item width and the static item spacing.
The `centerLayout` method updated the X offset of each item with the logic explained above.
That’s it! We created a simple Centered Flow Layout using only the layoutAttributesForElements method.
*Note that the documentation states the following:
// Additionally, all layout subclasses should implement -layoutAttributesForItemAtIndexPath: to return layout attributes instances on demand for specific index paths.
// If the layout supports any supplementary or decoration view types, it should also implement the respective atIndexPath: methods for those types.
Which means, you should also implement the `layoutAttributesForItemAtIndexPath`, but the basic example works without it too.
The whole project for download can be found on GitHub here.